Disclaimer:
The information contained on this website is based on the experience of the author (s) and is only being provided to show their method used to achieve the desired results. What you do with this information is your choice and your responsibility. Persons choosing to use this information do so at their own accord and risk, and thus assume any and all responsibility for any damage, injury or death as a result. It is recommended that you always have a gunsmith check any work you do before firing a rifle you have altered.
How to Build or Rebarrel a Savage Rifle
I recently had the pleasurable experience of building my own custom target/long range rifle. Perhaps the most impressive part of my rifle is that it cost considerably less to build than buying a new Remington Sendero from Cabelas. Depending on what you want to do with the rifle it might cost a lot less.
Click the images for a larger view
Many of us have heard of guys building their own tack driving rifles. Usually their buddy is a machinist and they have access to a lathe and other tools. They also have some Remington M700 just laying around collecting dust they can use for their build. Good for them.
Most of us don’t have a buddy with a lathe or extra actions just laying around waiting to be turned into custom rifles. The good news is that with a little reading and some cheap tools you can build your own custom tack driver. You don’t need expensive machinery, a buddy machinist, or an extra action lying around. The really exciting news is that you can do it relatively cheap.
I wanted a rifle that I could shoot the NRA Highpower 1000 Yard matches with and be competitive. I wanted something I could shoot varmints or large game with. I wanted a custom hand lapped barrel. I wanted a stock that fit me well and was comfortable to use prone. I wanted a rifle that would shoot 1/2 MOA at 100 yards. I had some other things that were important to me as well but I won’t get into right now.
How I did it…
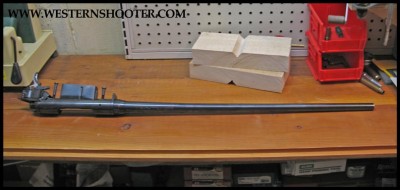
The easiest way for me to illustrate building a Savage custom rifle is for me to walk you through my own build and the things I learned.
The first thing I did is decide that I wanted a .308 Winchester. .308’s are easy to handload for, good brass is readily available, barrel life is excellent, recoil is mild, high quality target and hunting bullets are plentiful and I could use it to shoot NRA F/TR Class matches.
With my caliber being decided I began to look for a Savage short action rifle to base my build on. Regardless of what your opinions of Savage are they really work for what we are doing better than any other rifle ever made.
I found a Savage Short action model 11 in .243 at a pawn shop. It was a youth model so the barrel was 20 inches and the stock was extra short. I didn’t want the stock and for some reason the pawn shop had a use for it so they knocked some money off the rifle. I walked out the door having paid $275. The rifle was the old action screw spacing of 4.275 but it did have an accutrigger. Looking back I would have been better off to have shopped for one that didn’t have an accutrigger, paid less and bought a better aftermarket trigger. Nevertheless, I did get the Savage Accutrigger down to 26 ounces and have been very happy with it. As a side note I found someone else doing a build who wanted my 20 inch barrel. They gave me $40 for it. That put me into the action $235.00
The next thing to decide was what barrel to get. If I was going to pay for a custom barrel I wanted it to be hand lapped. After much research, many phone calls and some mental anguish I decided on a McGowen Precision barrel.
McGowen Precision Barrel
McGowen Precision …..was great to deal with. They were a little hard to get a hold of on the phone, I assume because of how busy they are. They were very nice, patient, and extremely knowledgeable. In my research on barrels I had found several custom rifle makers that were building rifles priced around $4000 using McGowen Precision Barrels and guaranteeing 1/2 MOA accuracy. McGowen Precision offers barrels for Savage actions that are completely chambered, threaded, and ready to screw on. McGowen Precision hand laps their barrels for a mirror smooth finish that is easy to clean. I wanted a 30 inch barrel for better velocity and had to pay a little more for it. Also, stainless steel barrels cost an extra $50 but you don’t have to do any finishing work (bluing) and so I think they are well worth the extra money. If you’re really on a tight budget you could go with the unfinished chrome molly barrel and paint it. (Since I wrote this McGowen has changed a few things. Their chrome molly Savage pre-fit barrels now come blued and are an exceptional deal for the money).
McGowen Precision offers 10% off to 1st time customers. You could easily walk away with a custom hand lapped barrel ready to screw on for $275. (I just bought a chrome molly barrel on their 2010 Christmas special for $221 plus shipping)
McGowen took about 3 weeks to get me my barrel which was excellent. Somehow I hadn’t communicated what I wanted because when I got the package open the barrel wasn’t chambered. It really might have been my fault. I called them and they were great. They had the barrel back to me inside of a week and they paid the shipping. They couldn’t have been better to deal with.
Regardless of what barrel manufacturer you choose make sure the barrel you order is threaded and fully chambered. Most manufactures refer to this as Savage Pre-Fit.
Bell & Carlson Medalist Rifle stock
I decided on the Bell & Carlson Medalist Rifle Stock after looking at every option available for the short action Savage. There are many excellent options available but the features combined with the price point were unbeatable. The stock has excellent ergonomics for shooting almost any position. I especially like the vertical handgrip for shooting prone. Bell & Carlson really outdid themselves with the CNC machined aluminum bedding block. I had already owned one of these stocks and used it on a Rem 700 LA. I have been nothing but happy with their stocks.
I found black B&C Medalist stocks online for as little as $198.00
Keep in mind that you don’t have to buy a new stock. The factory Savage stocks can be bedded, forearms stiffened, and barrel channel opened if needed. I have also heard of people successfully using automobile bondo to change the shape of the stock to one more desirable for their shooting needs.
Sharp Shooter Supply Recoil Lug
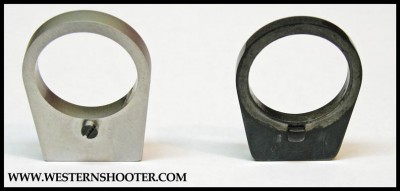
The recoil lugs that Savage uses are anything but precise. I measured mine after removing it and found it to be substantially thicker on one side than the other. Regardless of the imprecise recoil lug many Savages shoot great out of the box. I opted to replace it with a thicker more precise stainless steel recoil lug made by Sharp Shooter Supply. $28
Sharp Shooter Supply Oversize Bolt handle
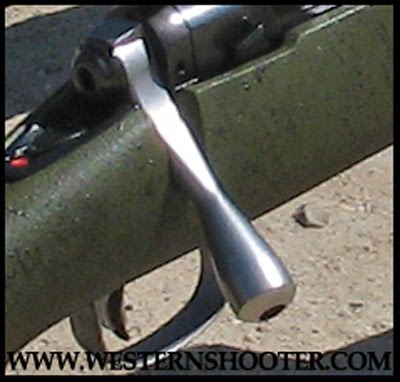
The Savage bolt is designed so that it’s easy to switch the bolt handle. No soldering just pull the bolt out of the back and switch bolt handles. Sharp Shooter Supply also offers different options for bolt handles. Changing the bolt handle is not necessary and would reduce your costs in the build by not doing it. I spent $40 on an oversize bolt handle.
Ken Farrel Industries Scope Mount Base
Since weight wasn’t an issue on this rifle I wanted a 1 piece steel scope mount. I felt that it might stiffen my action and help with accuracy. I chose a Ken Farrel base. They are CNC machined and held to tighter tolerances than the Savage action I was using. Farrel Industries has been making rings and bases for years and are known for excellent quality and customer service. The base also has a bedding channel on the bottom to make sure it fits your action without creating any stress. Ken Farrel bases and rings are among the best available.
Read more about Ken Farrel Bases by visiting their website.
There are other options for bases that cost less and that will work fine.
Burris Signature Zee Rings
Regardless of what scope you are using the Burris Signature Zee Rings are an excellent choice. They give you the ability to mechanically zero your rifle or add elevation. They are priced around $50.
Tools
Some of the tools and supplies you will need for assembling your rifle are nice to have but not necessary. There are two ways to look at tools. 1) One, As a long term investment that you will keep forever and use many times on different guns. 2) Two, you can buy the ones you need and resell them. I believe you could get 85% of your cost in the tools back by selling them on forums, gunbroker, or ebay.
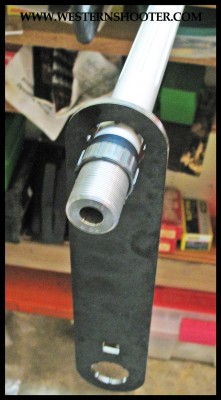
Barrel Nut Wrench
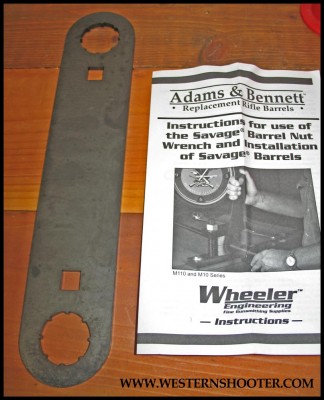
The barrel nut wrench is one of the tools you have to have. It can be bought at several different places. Sharp Shooter Supply carries them. I bought a Wheeler Engineering one at Midway USA for $38. It came with excellent instructions.
Barrel Vise
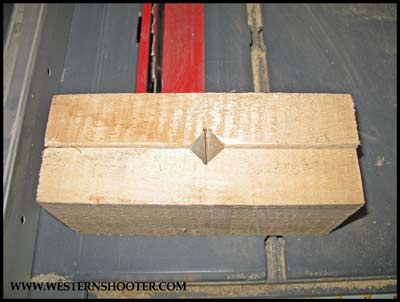
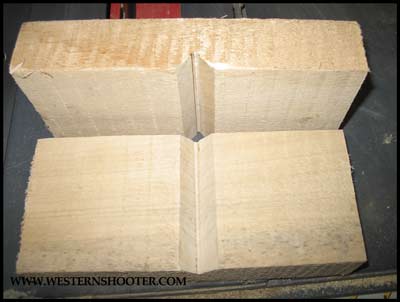
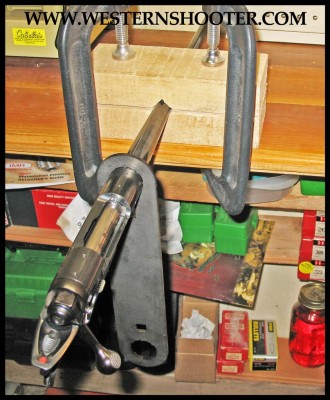
These are nice to have but cost a lot of money considering they only work marginally well. The ones that work the best cost so much money that they will make your build more expensive than it should be. If you already have one or know someone that has one great! As a substitute and for the purpose of holding everything you can use two pieces of hardwood and some clamps or a regular shop vise. I cut grooves in the pieces of wood with a table saw to create a barrel channel.
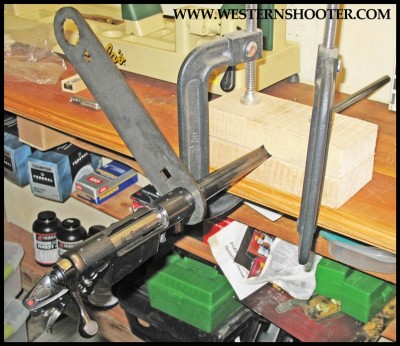
Action Wrench
This is a relatively expensive tool but I think your money is better spent on this than on a barrel vise. When you go to tighten everything down if you don’t have an action wrench it makes it harder to keep everything headspaced correctly as there are four pieces of metal that all come together. I did my first build without one. It can be done. It does really make things easier if you have one. Also, you can get by without a barrel vise if you have an action wrench. You will use this tool for both removing the old barrel and putting on a new one. I have an acquaintance that built one out of wood that apparently works excellent. $56 at Midway USA
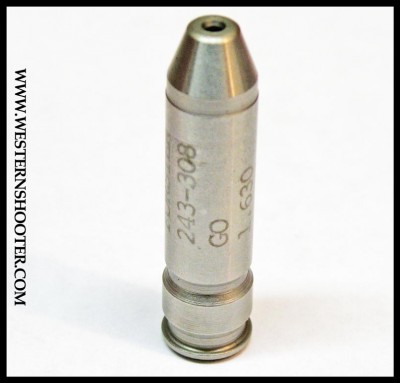
Go Gauge (Headspace Gauge)
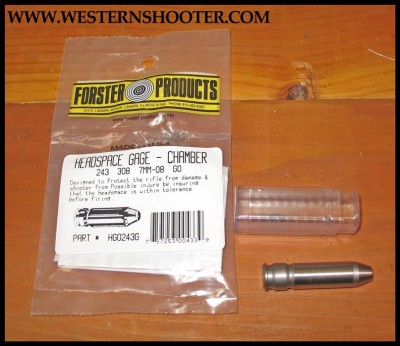
This is another one of those tools that in my opinion is necessary. There are guys that successfully build savage rifles that only use a piece of new brass for headspacing. Apparently it works. However, they might not ever be able to use factory ammunition and they might have to always buy the brand of brass they used. The Go Gauge only costs $22 at MidwayUSA and is perfectly in spec. There is no guarantee that brass will be. Never Use a Live Cartridge for Headspacing!
No Go Gauge
This is a tool that is not necessary. You can buy one if you want but I don’t think it’s needed. It can also be purchased at Midway USA for $22
Copper Anti-Seize Lubricant
I bought mine at NAPA. They use it on Spark plugs. It only costs a few dollars. You use it on the barrel threads.
Torque Wrench
This isn’t necessary but is nice to have so you know how tight you’ve made the barrel nut. I bought the one I use at Wal-Mart for $22 several years ago. All mechanics have one and I’ll bet a place like Checker or AutoZone would let you borrow one for free.
Some thoughts on the Savage action you buy.
Buy a Savage action that is already chambered with a cartridge that uses the same bolt face as the one you will be building. For Example: I built a .308 on an action that had been a .243. If you are going to build a magnum get a rifle with a magnum bolt face (i.e. 7RM, 300WM, 270WSM etc.) This will save you time, money, and hassle. If you can’t find one, you can find new bolt face assemblies at Midway USA or Sharp Shooter Supply. The problem is that Savage made changes to their rifles over the years that complicate changing the bolt face. If you bought a really old action and then try to change the bolt face you may run into complications. It can be done it just might not be easy. Sharp Shooter Supply has some information about this on their website that might be useful (see references at the bottom of this page).
Also, be aware that the Savage WSM actions come from the factory with a larger barrel shank diameter. Make sure you don’t order a barrel with the wrong shank diameter for your action. (see more on this below)
If you are going to be picky about the stock you use make sure the stock manufacturer makes one that fits your action screw spacing. When you go buy an action bring something to measure action screws with.
Savage Bolt Action – Action Screw Measurements
Long Action: 5.062″ (all years)
3rd Gen Short: 4.400″ (2006 – present)
2nd Gen. Short: 4.275″ (1998 – 2005)
1st Gen. Short: 4.522″ (1959 – 1988)
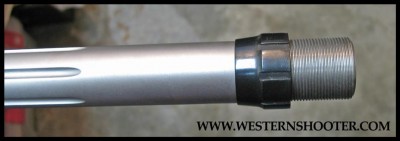
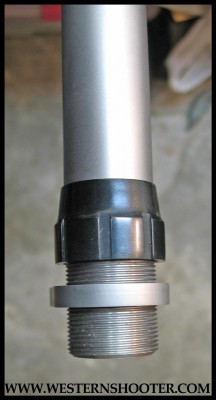
Standard/Small Barrel Shank size/diameter is 1.055″ x 20tpi
Large Barrel Shank diameter is 1.120″ x 20tpi (Large is only found on Savage Single Shot Target models, Short Mag Models, and Ultra Mag Models. It is possible to get an early production Short Mag or Ultra Mag with a small shank barrel diameter. If in doubt pull the barrel and measure. I had a long action savage with small/standard threads opened up to accept large shank barrels. The procedure cost me $50.)
Read on for Headspacing/Rebarreling Instructions
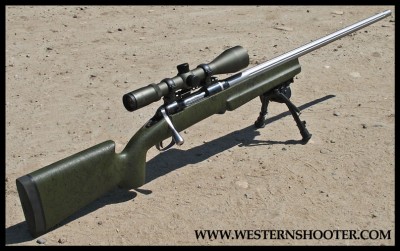
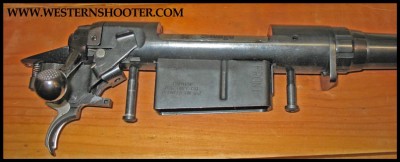
The Savage Model 11 the author customized and a re-barreled.
My rifle turned out better than I could have imagined. If I were to commission a professional gunsmith to build the same or similar rifle it would cost me at least $2000 and likely more than that. There is also a sense of satisfaction that comes from putting together a rifle that shoots extremely well. On a regular basis the rifle shoots 10 shot groups that are well under an inch from a bipod.
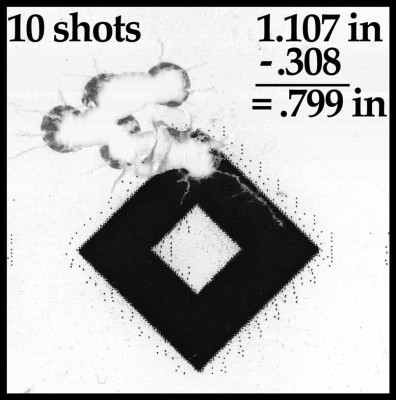
100 yards, 10 Shots, prone, from a bipod. Nosler Custom Competition 175g bullets, Lapua brass, standard loads using Varget.
Total costs were as follows:
Savage model 11 Action w/Accutrigger $235
McGowen Hand Lapped 30 inch Stainless Barrel $350
Bell & Carlson Medalist Stock $198
Sharp Shooter Supply Stainless Recoil Lug $28
Action, Barrel, Stock, & Recoil Lug, Total $811
Stainless Trigger guard SSS $20
Oversize Bolt Handle $40
Accessory Total $60
Forster Headspace – Go Gauge $22
Wheeler Engineering Barrel Nut Wrench $38.49
Wheeler Engineering Action Wrench $56
Anti Seize Lubricant $4
Tool Total $120.49
Grand Total = $991.49
If I were to sell the tools and get 80% of what I paid for them back my total costs would drop to: $898.30
Barreling and Headspacing a Savage Rifle
1. Make sure your rifle is unloaded.
2. Remove the stock from your Savage barreled action by removing the two action screws in the bottom of the stock. Don’t lose these! Also, remove the bolt and scope or scope base and rings. Remember how this stuff comes apart so you can put it back together.
3. Place your barrel nut wrench over the barrel and onto the barrel nut. You need to do this step before placing the barrel in a vise.
4. Place the barrel in the barrel vise or wood blocks and clamp it down. If you don’t have an action wrench you are going to need to get the barrel vise tight! Powdered rosin, like is used by bull riders or on baseball mitts, can help make the barrel stick in the wood blocks better.
5. If you have an action wrench attach it now and place the bolt that comes with it in the action. Make sure its snug.
6. It might help to place a cheater bar (a bar with a ½ inch socket drive fits the barrel nut wrenches) on the barrel nut wrench. If you have an action wrench use a scissor motion to work the barrel nut wrench against the action wrench. If you don’t have an action wrench you are hoping the barrel vise will keep the barrel held tight and not allow it to slip while you loosen the barrel nut. A good hard blow from a hammer to the barrel nut wrench will usually break things loose. If you have a really tuff barrel nut it could help to spray some Break Free, Kroil or WD-40 and let it run down the threads. Make sure you are turning the barrel nut in the correct direction. Mild heat can also help if you have a really tough barrel. You can also use a large crescent wrench on the recoil lug in place of an action wrench. You might however mess up the finish. Do this at your own risk
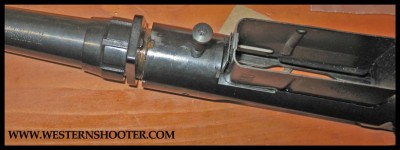
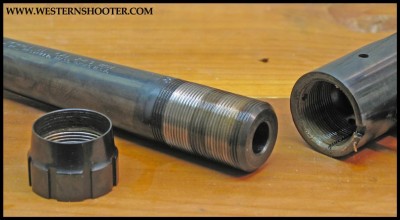
7. Remove the barrel nut and slide the recoil lug back. Screw the barrel out of the action. Pay attention to how it goes together as you will be reversing these steps when you are done.
8. The action I used had some kind of thread locker on the barrel threads and the action threads. Clean the action threads.
9. At this point I did an additional step. I lapped my locking lugs for better contact. If there is interest in how I accomplished this I may write about it later. Note: You should never lap your lugs after the headspace has been set as it will make the headspace change!
10. Place barrel nut wrench on barrel and place in barrel vise. Screw your barrel nut all the way on your new barrel.
12. Place a small amount of copper anti seize lube on the threads of the barrel.
13. Start screwing the barrel into the action.
14. Place your bolt in the action and place the “Go Gauge” headspace gauge either in the boltface or in the chamber. The extractor will hold it in place or “pop” over/on as you tighten the barrel. Leave the action cocked. This will keep the firing pin from influencing what you feel against the headspace gauge. It is recommended by both Brownells and Wheeler Engineering that you remove the extractor. I didn’t and had no problems.
15. Screw the barrel down against the “Go Gauge” until it stops.
16. Make sure your Recoil lug is positioned correctly
17. Work the bolt handle. If you feel no resistance the barrel needs to be screwed in tighter. If it feels tight all the way through the stroke the barrel needs to be loosened. You should feel just a little bit of resistance at the very bottom of the bolt stroke. When you feel just a tiny bit of resistance, your “Minimum” Headspace is set.
18. Tighten down the barrel nut. Be careful not to change your headspace. Use your barrel nut wrench and get it tight.
19. Recheck your headspace by making sure that your bolt will close on the Go Gauge. Never force it. You should just barely be able to feel it right at the end.
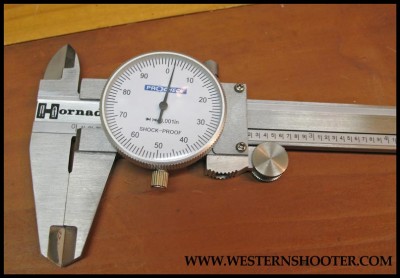
20. If you bought a “No Go Gauge” now is when you place it in the rifle. You should only lightly try to close the bolt as forcing it closed can damage your bolt and receiver. Use just a thumb and forefinger. The bolt should not close on the “No Go Gauge”. You don’t want the bolt handle to close more than halfway. If the bolt closes more than halfway or completely closes headspace it too great and you need to start over. If you didn’t buy a “No Go Gauge” you need a shim. If you have calipers you are looking for something that is .001 or .002 thick. Carbon paper from credit card receipts is about that thickness. Place the shim in the end of your bolt face. Your bolt should not close or should be very tight. Once again don’t force the bolt.
(Click on the image for a larger view) Carbon paper as is found in credit card receipts is extremely thin and after being measured in calipers is used as a shim.
Place your .001-.002 shim in the boltface. The bolt should not close on the “Go Gauge” with the shim in place. This procedure takes the place of a “No Go Gauge”.
21. If all is well in the headspace department I recommend torquing the barrel nut down with a ½ inch torque wrench to at least 40 foot lbs. Rumor is that Savage torques them to 75 but that might just be a rumor. If you don’t have a torque wrench get the nut tight with the barrel nut wrench and then hit the end of the wrench once or twice with a hammer to give it that last little bit.
22. Recheck headspace
23. Reassemble your rifle and go shooting.
Other good reference articles for building a Savage Rifle:
Brownells – Rebarreling a Savage Rifle
MidwayUSA – Savage Rifle Gun Parts Information


Good article. MEC makes an anti-seize some folks might have on hand, and brown sugar works good for the barrel blocks.
I really enjoyed your article, glad I just found it tonight! I have a Stevens action in .223 that I am building right now. I put a Rifle Basix trigger in (it was non-accutrigger) and tomorrow my B&C Medallist in OD Green is supposed to arrive. My final step is going to be a McGowen barrel SS barrel.. pretty slick and kind of funny to see someone doing the exact same thing I decided on! I also appreciate your step by step on changing the barrel because you can’t do enough research beforehand!
Nathan, Glad you enjoyed the article. Please make sure and report back to us on how your project turns out. Good luck!
I’ve read your article many, many times and find it accurate and very useful. I recently built a Savage .243 varmint/target using an ER Shaw barrel, Boyds thumbhole stock and rifle basix trigger. Next was a .257AI (used the long action) with McGowen barrel, Choate varmint/target stock, and Rifle Basix 4 ounce target trigger. Both shoot 1/4 to 3/8 inch groups and were easy to work up loads for. Both have a fairly fast twist for the heavier bullets.
Thanks for the article. Using the Savage platform puts an accurate rifle in just about every ones reach. Put your money in a good barrel….Robert
I really enjoyed your article. I am not extremely knowledgeable about building custom guns but I would like to build my own long range .308. Is the 243 the only other short action that can be used to build a .308 or are there others? Also, do you suggest bedding the stock?
Savage makes other short actions but the calibers that use the same bolt face as a .308 are .243, .260, and 7mm-08. If you need any other clarifications just ask. Bedding the stock is a good idea especially if you don’t have pillars or an aluminum bedding block. If you use a Bell & Carlson Medalist stock you may not see any improvement by bedding so the answer really is–depends on what stock you are using.
I really enjoyed your article and am currently following it for my own build. One question, I notice that Mcgowan barrels in the 30″ variety all come in the contours with 1.200″ shanks which are larger than the savage standard 1.062″. Did you have to get a different barrel nut or did they just stretch a savage contour to your design?
Awesome article here True Pearce! This really brought back a bit of interest to my Savage Model 11 I got years ago, and was thinking of doing a similar conversion to yours.
I have what I believe is the second generation Savage Model 11 with a blind magazine. I was wondering if I needed to convert the blind magazine to accept .308 as it is configured currently for .243.
Whether I need to convert it or not, I was interested in converting the blind magazine to the removable box mag and choose a stock similar to yours – I was wondering if that is possible and what would I need to make the conversion?
I tried Googling around for an answer, but it is hard to find any information on my obsolete model.
Really great article. I appreciate your thoroughness and all the photos you provided. I know how hard it is to communicate technical topics like this, so I just wanted to take a minute to say that I appreciate the work you put into this.
Thanks,
Cal Zant
PrecisionRifleBlog.com
Are there different length long actions? My question is specifically will a 300 RUM fit any a standard long action?
The actual action lengths are the same. However, Savage usually chambered their 300 RUM rifles on large shank long actions. I don’t know whether it’s really needed but I’d be careful. Also, depending on what action you have, the bolt head might have to be changed to fit 300 RUM. I’d post your question on the Savage Shooters Forum.
Are you able to use the Savage axis in the same manner as a 10/11? Or are there different steps to be taken that differ from your article here
It’s a different action and in my opinion would be less desirable.
Great info, thanks. My barrel came off very easy. If you use acetone with Kroil it really breaks down any adhesives. Also suede leather can be used to help grip barrel in vise. https://www.grafs.com/retail/catalog/product/productId/176 Action wrench I had to use considering my 110 has soldered scope bases, not enough room for wheeler wrench. Hope my experiences help.